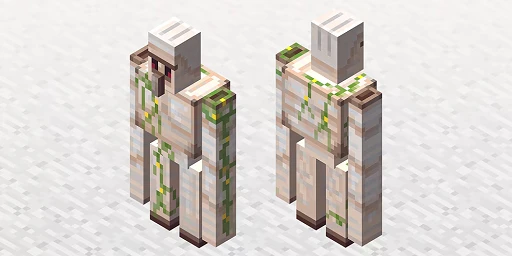
Iron Golems are natural protectors of villages in Minecraft. They are large and strong, capable of taking a lot of hits. They are not hostile to players unless provoked. However, if they do strike, you’ll quickly notice their strength! Can we harness this mechanic for our benefit? Yes, we certainly can! Iron Golems are a great way to not only defend your own base but also to withstand raids in villages. Today, we’ll explore several functions on how to set this up and even partially automate it.
Why Use Iron Golems to Defend Your Minecraft Base?
First, it’s important to know what you can use Iron Golems for. You can either use them for yourself or to defend villages. Understanding their mechanics is crucial. Iron Golems only react when they themselves or a villager is attacked. Even if you build your own Iron Golem, it will not react if you are attacked. However, Golems work together within a certain radius and respond to almost all hostile mobs—except Creepers and Wolves.
Defend Your Minecraft Base with Iron Golems: Step-by-Step Guide
Since you can build Iron Golems yourself, you can use them to defend your base. It’s best to use a fence to keep the Golem from wandering off. Self-built Golems do not adhere to their creator or a specific radius.
A cool tip is to create a kind of personal village within your base. Three villagers and buried beds are enough. Iron Golems will naturally spawn in the radius, but your self-built defenders will be directly tied to your underground village and won’t wander off.

When you utilize Iron Golems in your own base, you can protect some of your important structures. This is helpful if you keep animals or helpless mobs that shouldn’t be attacked by monsters. Again, the trick with the artificially created village can be beneficial.
Using Iron Golems Against Raids: Defend Village and Base
Iron Golems are the defense machines for villages and villagers. They spawn naturally in villages, which we’ll discuss in more detail in the following section. You can also build them yourself within an existing village, and the Golem will join the village and protect its inhabitants. Once night falls, Iron Golems become active and attack anything approaching the village.
This is particularly helpful during a raid. You can trigger a raid by carrying the “Bad Omen” status effect into a village. Be well-prepared with a large number of Iron Golems to help you with waves of enemies and protect the village.
Crafting and Using Iron Golems for Your Defense in Minecraft
Creating Iron Golems with Iron and Pumpkins: Here’s How
If you want to invest resources yourself, you can mass-produce Iron Golems and use them for defense. You’ll need 4 iron blocks for the body and a carved pumpkin for the head. You can use an automatic farm for both to have unlimited iron and pumpkins! You can also mine iron in caves and grow pumpkins manually, depending on how you prefer to play.

The advantage of self-built Iron Golems is that they won’t attack you. Even if you accidentally hit them, they remain neutral towards you. However, they will attack monsters within their radius.
One way to automate this is by using a dispenser and a Redstone signal to activate the pumpkin. This allows Golems to be built automatically and attack in emergencies. You can build Iron Golems in any orientation as long as you maintain the T-shape and the carved pumpkin. This gives you various options for constructing such a mechanism.

Using Villagers to Generate Iron Golems for Your Village’s Protection
Most Iron Golems you find in a world are directly tied to a village. Depending on Java and Bedrock, there are different spawn rules, but it’s essential to have enough beds and residents to generate Iron Golems. For Java, 5 are enough, as in an automated iron farm. There, new Golems are spawned by the villagers, but instead of killing them for their iron, they can be used as a defense mechanism.

This saves a lot of iron and pumpkins. The more villagers you have, the more Golems will be produced. Villagers regularly check the ratio of Golems to residents. Once they are there, they cannot disappear.
Basically, Iron Golems remain within their village’s limits. If they stray too far, they will try to find their way back home. If they encounter another village along the way, they will join it. You can transport Golems from one village to another, preferably with a lead.
Finding and Freeing Iron Golems in Pillager Outposts
As counterparts to villagers, Pillagers have their outposts. Occasionally, they keep Iron Golems in cages. Free them, let them fight the Pillagers, and use them for yourself! If you stumble upon such an outpost, free the Iron Golem and return it to its village or your base.
Repairing Iron Golems in Minecraft: Easy Base Defense
A cool mechanic that many players may not know is the ability to repair Iron Golems. Over time, even these large machines take damage, which is visible in their appearance. If the Golems show cracks, it’s time to repair them. Simply use some iron ingots and click on the Golems several times to heal them. This costs significantly less than building a new Golem with 4 iron blocks, which is always 36 iron ingots!

Conclusion
Iron Golems are truly fascinating, yet many players barely notice them or only use them for their iron farms. However, these giants can do so much more! Defend your base effectively with an Iron Golem system on your own server. Rent your Minecraft server and keep your world safe! They are truly helpful, not just for you, but also for your important villagers. With them, you can withstand any raid, especially if you can repair Iron Golems.


