A sugarcane farm is a great way to automatically produce various resources. Nowadays, there are exciting Redstone blocks that make this task easy for you. You just need to set up the farm, and it will do its job on its own. Moreover, it can be expanded infinitely, so there are no limits for you. But why do you actually need so much sugarcane in Minecraft? We will also look at various applications and provide you with one of the simplest guides to build your own sugarcane farm in Minecraft!
Minecraft Sugarcane: What You Need It For and How to Harvest It
Sugarcane is a green block that can naturally be found in the world of Minecraft. It grows mainly along the coast and can be found on both grass and sand. The climate doesn’t make any difference, as it also grows next to an ice block. However, it appears more frequently in swamps and deserts. Natural sugarcane grows up to three blocks high. In very rare cases, there are also ones that grow four blocks high.
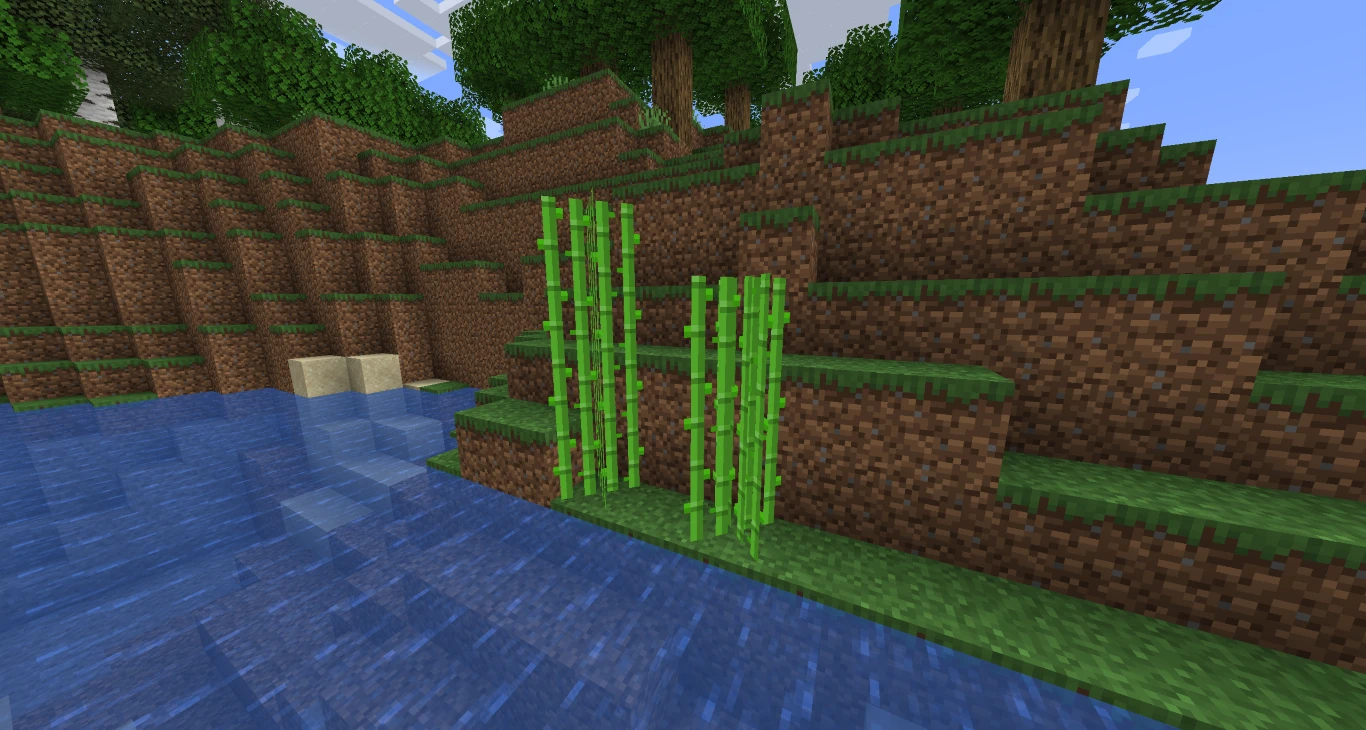
You can harvest sugarcane with a simple punch and carry it with you. It can only be replanted next to a direct water source. It must be placed on a variation of dirt or sand to grow. While it must grow naturally in the Java Edition, you can use bone meal in the Bedrock Edition.
Sugarcane has two different recipes: Paper and Sugar! But what can you craft with it?
Sugar:
- Books
- Banner Patterns
- Cartography Table
- Maps
- Rockets
Paper:
- Cake
- Fermented Spider Eye
- Pumpkin Pie
- Brewing Potions
Building a Minecraft Sugarcane Farm: Step-by-Step Guide for an Automatic Farm
Most of the sugarcane you’ll likely need is for paper, whether for books or rockets. Waiting and harvesting it yourself is definitely not helpful and can take a long time. This is where the automatic sugarcane farm comes into play! It is really easy to build, and you don’t need a deep understanding of Redstone. Once the farm is built, you can expand and customise it as you like.
Materials for Building Your Sugarcane Farm
- Building material
- Glass
- Water bucket
- Some sugarcane
- Hopper
- Chest
- Mud (alternatively dirt and water bottles)
- Redstone dust
- Pistons
- Observer
Detailed Guide: How to Build Your Minecraft Sugarcane Farm
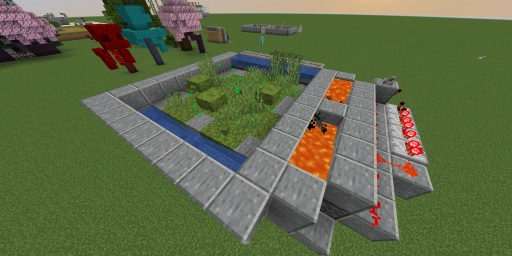
1. Dig a Trench
We will show you a small version of the farm, which you can expand according to your own ideas. First, mark out your parameters. A channel two blocks wide and a sort of trench is the prerequisite and helps to make the design as compact as possible. You can embed the whole thing in the ground or, like us, surround it with any building blocks. We’ve opted for a length of 8 blocks.
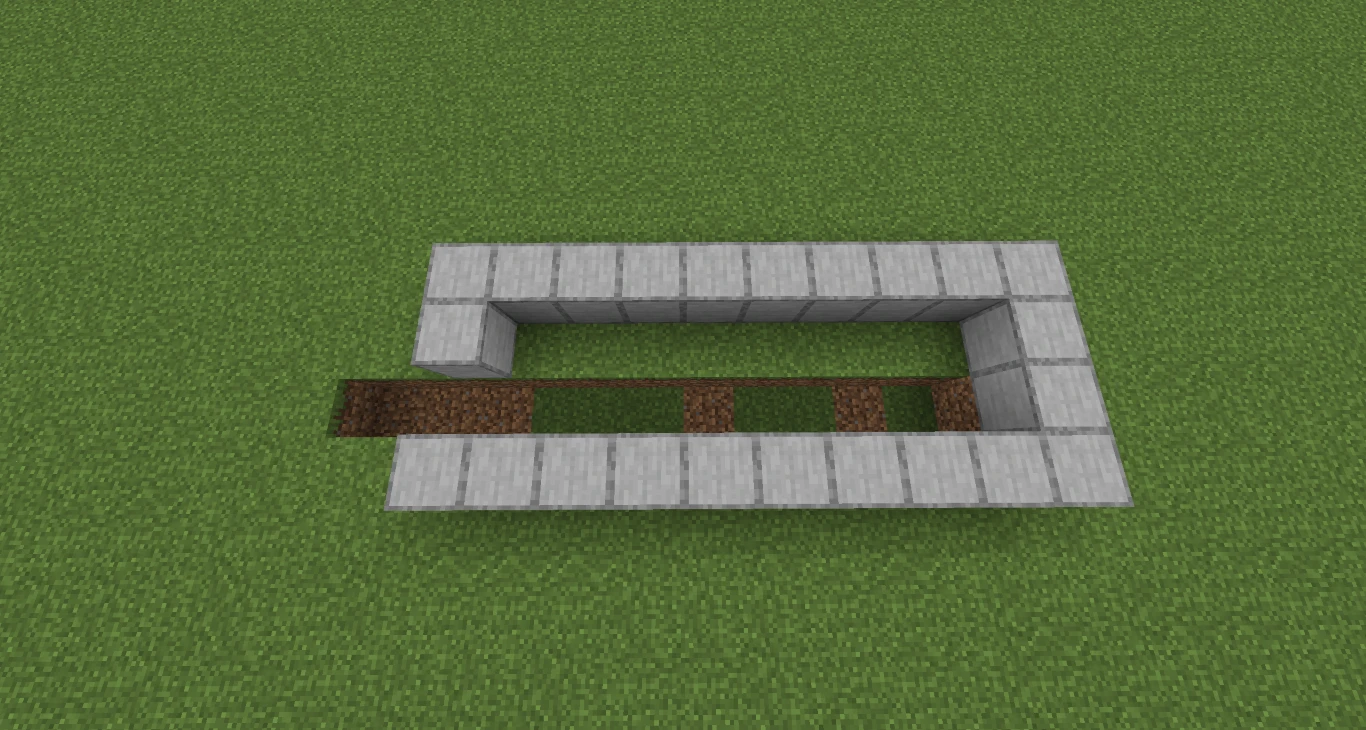
2. Collection Station and Mud
Next, fill in the trench. The deeper side is for the hoppers, which will later catch the sugarcane and direct it into a chest. You might already know this mechanism from our other farms. The larger the farm, the more iron you’ll need, but you don’t have to go overboard.
Now let’s take a closer look at the mud block, as it is used above the hoppers. One of the most interesting features of mud is that it is not a full block. When you walk over it, you’ll notice your character sinks slightly. This also happens with items lying on the mud. The sugarcane is practically pulled through the mud into the hoppers, which not only saves space but also makes your farm 100% efficient! Nothing is lost, and the sugarcane can grow undisturbed.
But where do you get mud? Well, you can find it in the mangrove swamp biome and collect it there. Alternatively, you can use dirt, coarse dirt, or rooted dirt with a water bottle to obtain mud. It’s a super easy technique that allows you to quickly and easily create mud without having to search for a biome.
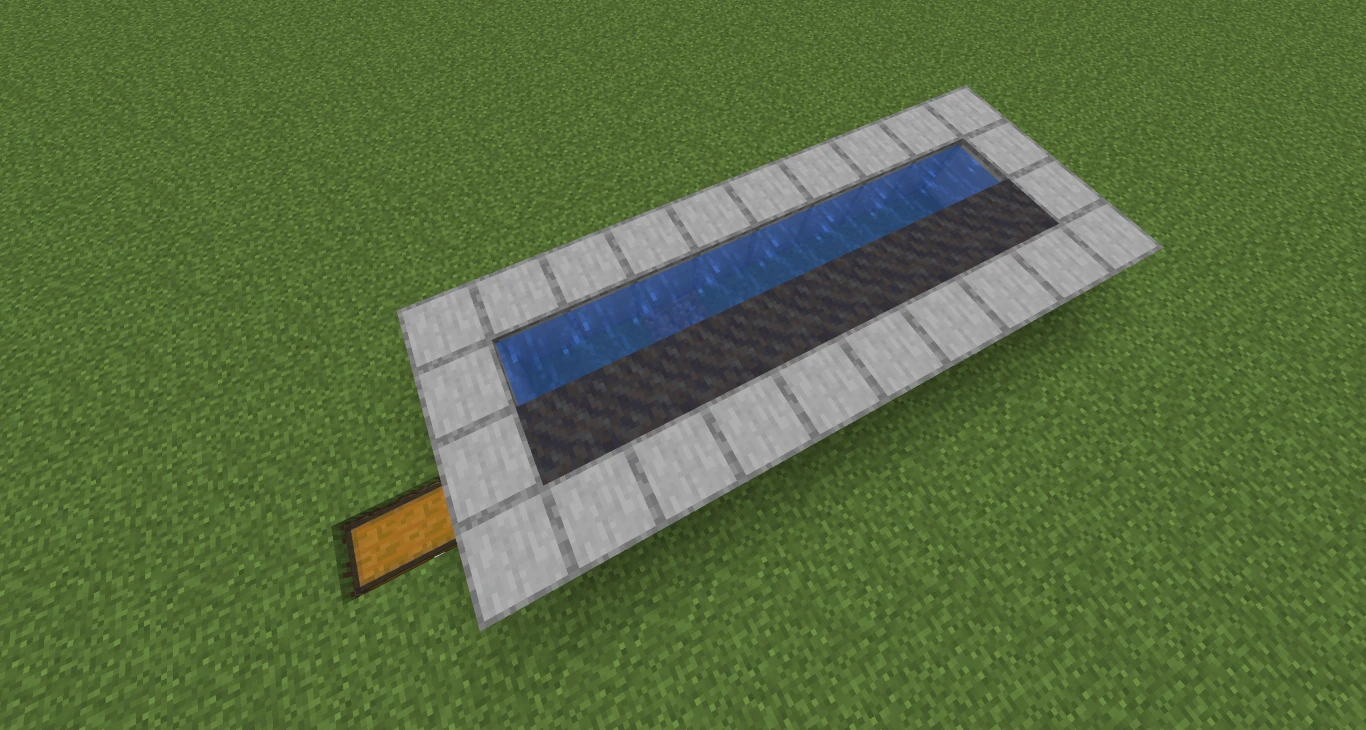
Place the mud above the hoppers. Fill the trench next to it with water so the sugarcane can grow.
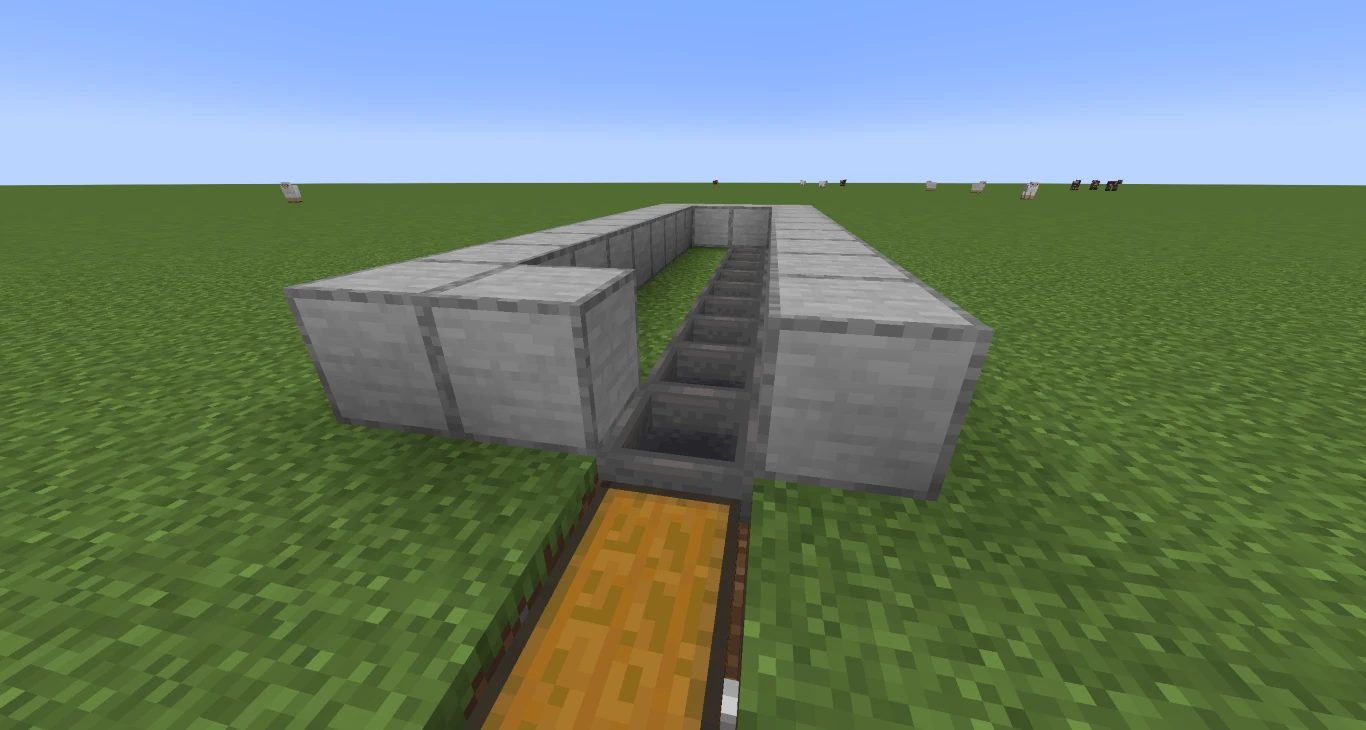
3. Redstone
Now let’s take care of the Redstone, which is really not difficult. First, place a row of blocks above the water and behind it. Then, have your pistons ready and attach them to the blocks above the water source. The wooden head of the pistons must point towards the mud, where the sugarcane will later grow.
Next, lay a row of Redstone behind the pistons. This will transmit the signal. A direct source is not necessary, as the observer takes care of that. These cool Redstone components react to changes and emit a Redstone signal accordingly. The piston below then reacts to this.
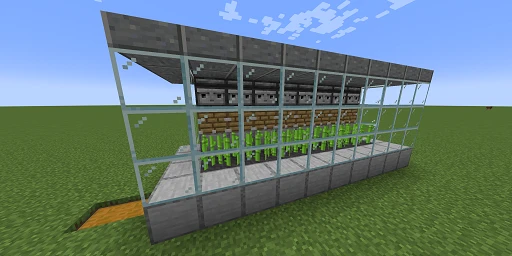
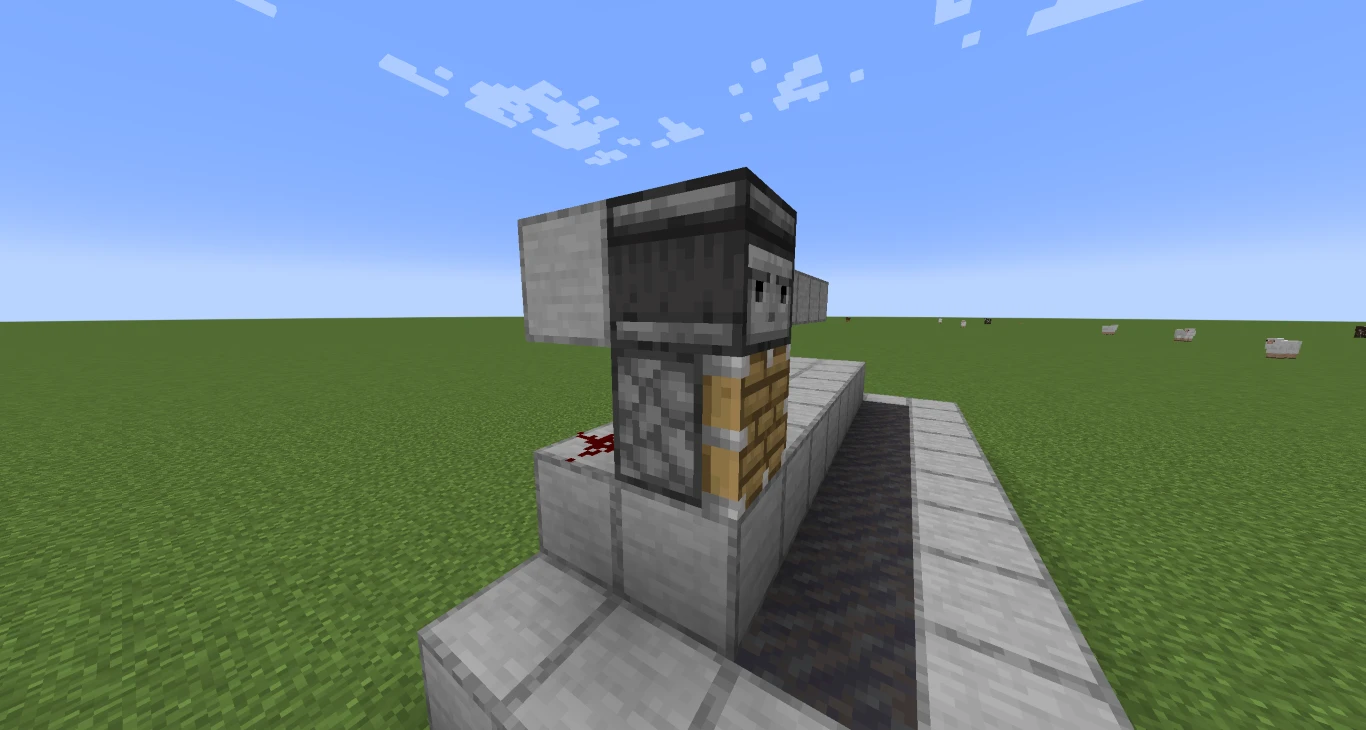
Observers are made from Redstone, cobblestone, and quartz, so you’ll need to go to the Nether. You can learn more about this in one of our articles (Surviving Minecraft Nether: Tips and Tricks for Experienced Players) . The block has a funny face and must also point towards the mud. When placing them, it’s best to do so from behind, as observers always face away from you.
Then, you need to lay a row of blocks behind the observers to transfer the signal downwards. Test the whole setup by placing a block in front of the observer’s face. It should detect the change, and the piston should briefly extend. This is how it will work with the sugarcane later. Repeat the process for all other fields.
4. Final Touch
The farm is actually ready for use now! You can plant your sugarcane at the bottom on the mud and let it grow slowly. Fill the rest of the farm with a block of your choice. Glass is always a good option, as it allows you to see if everything is working. Use full glass blocks so nothing gets stuck at the edges. Voilà, your sugarcane farm is finished!
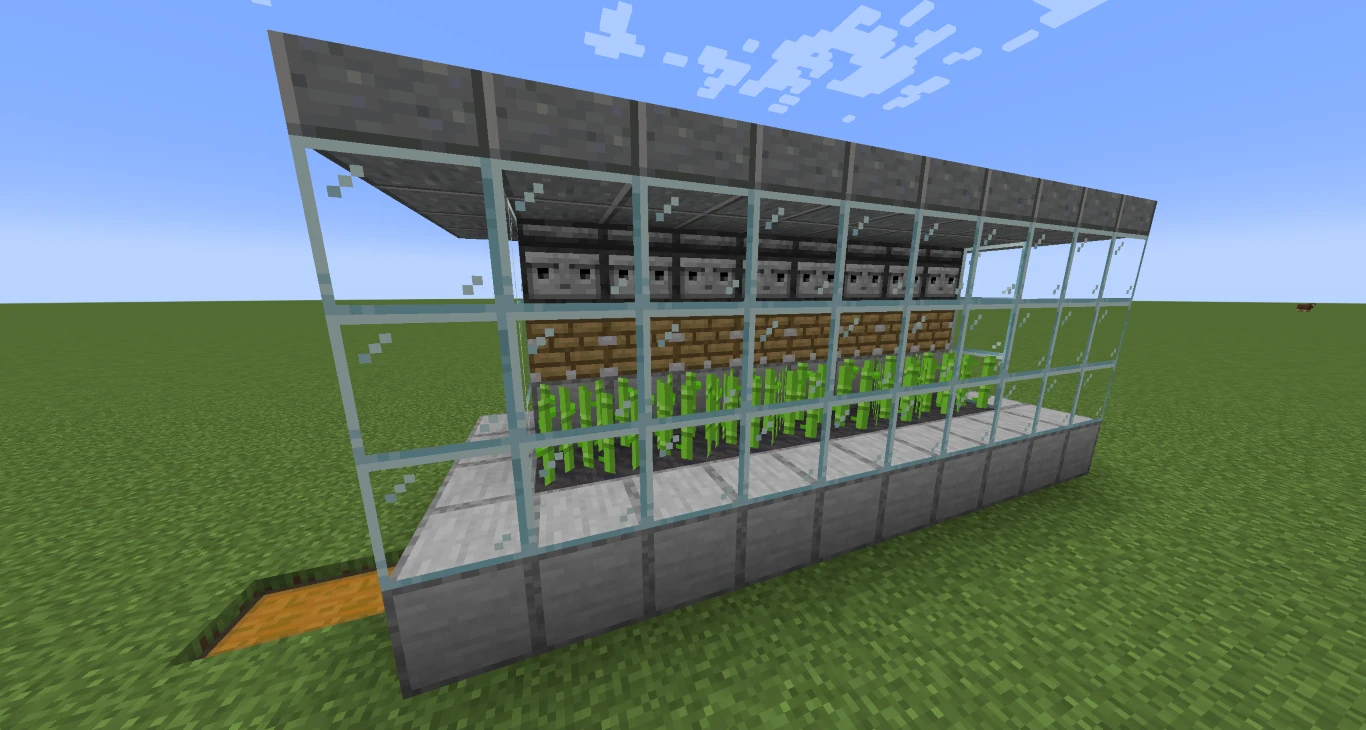
When the sugarcane grows and reaches a height of three blocks, the observer detects it and extends the piston. This harvests the sugarcane, and it falls through the mud into the hoppers below. The good thing about this design is that only the piston underneath is activated, not the ones next to it.
Conclusion: Automatic Sugarcane Farm in Minecraft for Endless Harvest
A sugarcane farm is a must-have in every good Minecraft world! With the help of an observer, it can now be completely automated, so you don’t have to do anything other than build it and then wait for your harvest. In the end, you’ll probably have more sugarcane than you can use. Use it for books, cakes, or fireworks. Produce endless sugarcane on your own server and maintain control over your resources. Rent your Minecraft server and build efficiently!
More interesting articles
Minecraft: Build an Automatic Glass Production – Step-by-Step Guide
How to Build an Automatic Bamboo Farm: Abundant Fuel and Building Material
Building a Minecraft Cactus Farm: Ultimate Guide for an Automatic Cactus Farm